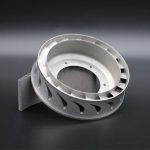
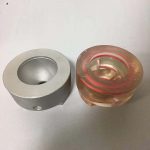
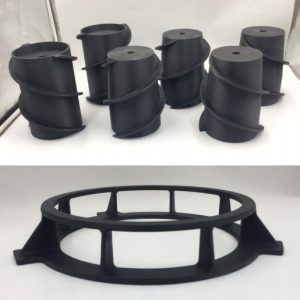
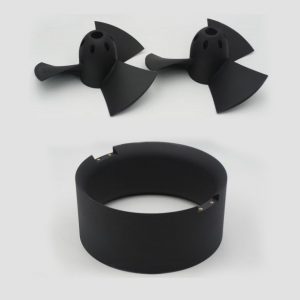
Aluminum Alloy AlSi10MG 3D Printing Material
3D Printing aluminum alloy AlSi10MG is ideal for combinations requiring good thermal properties and low weight.They can be machined by hand, spark etched, welded, micro-shot peening, polished and plated.
Metal SLM 3D printing technical parameters
1. Maximum molding printing size of metal 3D printer: 280x280x350mm;
2, 3D printing layer thickness: 0.02mm~0.04mm;
3, 3D printing accuracy: typical accuracy: ± 0.02-0.05mm (accuracy is related to geometric shape.Vary according to product size, printing direction, material and post-processing method.;
4, later processing: high temperature annealing, polishing, welding and other processing;
3D printed material characteristics
3D Printing aluminum alloy AlSi10MG is ideal for combinations requiring good thermal properties and low weight.They can be machined by hand, spark etched, welded, micro-shot peening, polished and plated.
Metal 3D printing design rules and matters needing attention
Material data
| Precision of parts | |
| ± 100 μm | |
| The minimum wall thickness | approx. 0.3 – 0.4 mm |
| approx. 0.012 – 0.016 inch | |
| Surface roughness | Ra 6 – 10 μm, Rz 30 – 40 μm |
| Ra 0.24 – 0.39 x 10-³ inch | |
| Rz 1.18 – 1.57 x 10-³ inch | |
| Fine shot peening after treatment | approx. 0.012 – 0.016 inch |
| approx. 0.012 – 0.016 inch | |
| approx. 0.012 – 0.016 inch | |
| Mechanical properties of parts | |
| Tensile strength | |
| In the horizontal direction(XY) | 430 ± 20 MPa |
| 62.4 ± 2.9 ksi | |
| In the vertical direction(Z ) | 430 ± 20 MPa |
| 62.4 ± 2.9 ksi | |
| The yield strength(RP 0.2%) | |
| In the horizontal direction( XY ) | 245 ± 10 MPa |
| 35.5 ± 1.5 ksi | |
| In the vertical direction(Z ) | 220 ± 10 MPa |
| 31.9 ± 1.5 ksi | |
| Modulus of elasticity | |
| In the horizontal direction( XY ) | approx. 70 ± 5 GPa |
| approx. 10.2 ± 0.7 Msi | |
| In the vertical direction(Z ) | approx. 65 ± 5 GPa |
| approx. 9.4 ± 0.7 Msi | |
| Elongation at break | |
| In the horizontal direction( XY ) | (9.5 ± 2) % |
| In the vertical direction(Z ) | (7.5 ± 2) % |
| Hardness | 120 ± 5 HBW |
| Fatigue strength | |
| In the vertical direction(Z ) | 97 ± 7 MPa |
| 14.1 ± 1.0 ksi |
Note:
1. Mechanical strength test, in accordance with ISO 6892-1:2009 (B) Appendix D, proportional sample, sample diameter is 5mm, the original standard distance length is 25 mm (1 inch).
2, According to Brinell hardness (HBW 2.5/62.5) hardness test in accordance with DIN EN ISO 6506-1.Note that the measured hardness can significantly depend on how the specimen is ready.
3. In the fatigue test with a test frequency of 50 Hz, R = -1, the measurement stops at 5 million cycles without breaking.
Stress relief: annealing at 300 ° C (572 °F) for 2 h.


About us
We are a direct manufacturer with a professional design and production team.We have more than 15 years of experience in 3D printing and CNC machining industries.Our factory is located in Building 45, 40 Changbang Road, Songjiang District, Shanghai.Welcome to our company!
About products & services
We provide customers (including designers, researchers, engineers, students, medical workers, makers, etc.) with one-stop service from 3D scanning, 3D customized design to 3D printing and post-processing.
Our business scope includes 3D printer sales, 3D printing services, CNC machining, 3D modeling design, 3D scanning services, laser engraving, casting, mass die-opening production and other services.
Currently, printable materials include photosensitive resin, PLA, ABS, nylon, glass fiber, metal and ceramic, etc., which are widely used in rapid prototyping hand boards, automobile parts, building sand table model making, product development, design verification, key functional parts making, small batch production, etc.
About price
We are a manufacturer and have complete production machines and facilities as well as professional teams,so we can certainly make your budget lower. Besides,we can provide you some samples free of charge for your evaluation. Of course, if you can send us your sample, it will help us provide you more cost-effective solutions. Please feel free to tell us your detailed requirements.
About payment
T/T, L/C,Western union, Paypal are all available.
About delivery & shipment
3D-printed parts and CNC machining usually take 2-15 days by air, depending on size and order quantity.


